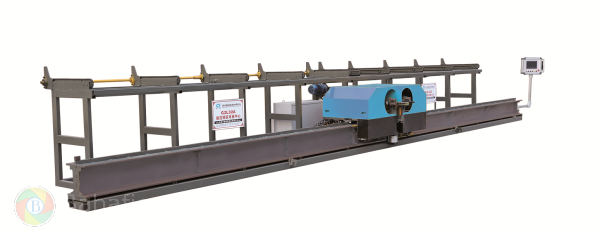
Mise Ă  niveau vers Pro

  • D2R Items: Best Beginner Sorceress Setup

    Starting your journey in D2R Items can be both exciting and intimidating. The game retains the deep mechanics and unforgiving systems of the original classic, which means new players often need time to learn how everything works. Among all the available classes, the Sorceress stands out as one of the most popular starting characters. Her powerful elemental magic, incredible mobility, and efficient farming potential make her a favorite choice for beginners and veterans alike.

    However, the Sorceress is not without weaknesses. She is fragile, heavily dependent on mana, and requires smart positioning during combat. Understanding how to build and play the Sorceress properly from the beginning will dramatically improve your experience as you explore Sanctuary. This guide will walk you through the most important things to know when starting a Sorceress, including skill selection, attribute allocation, leveling strategies, gear priorities, and survival tactics.

    Why the Sorceress Is a Great Starting Class
    The Sorceress excels at ranged combat and elemental spellcasting. Unlike melee classes that must stand close to enemies, the Sorceress can eliminate monsters from a safe distance using devastating magical attacks. This ability to deal damage without exposing herself to constant danger makes her very effective during early gameplay.

    One of the biggest advantages of the Sorceress is her access to the Teleport ability. Teleport allows instant movement across the map, which dramatically increases travel speed and provides an escape option when surrounded by enemies. Because of this skill, Sorceresses are widely regarded as the fastest characters for farming bosses and valuable loot.

    Another reason players start with the Sorceress is her ability to clear large groups of enemies quickly. Many of her spells deal area-of-effect damage, allowing her to eliminate multiple monsters at once. This makes leveling faster and farming runs more efficient compared to many other classes.

    Despite these advantages, the Sorceress has low health and defense. A careless player can easily be overwhelmed if enemies get too close. Learning to maintain distance and control the battlefield is essential for survival.

    Understanding the Sorceress Skill Trees
    The Sorceress uses three elemental magic trees: Fire, Cold, and Lightning. Each tree offers a different combat style and unique strengths.

    Fire spells are known for their high damage output and explosive attacks. Abilities like Fireball and Meteor can deal massive damage to groups of enemies. Fire builds are popular for early leveling because they clear monsters quickly.

    Cold spells emphasize control and safety. Many cold abilities slow or freeze enemies, giving the Sorceress more time to reposition or escape danger. Blizzard, Frozen Orb, and other cold skills are extremely powerful in both early and late gameplay.

    Lightning spells offer high potential damage but are less predictable because lightning abilities often have wide damage ranges. Skills like Chain Lightning can clear large groups of enemies rapidly but require more investment to become truly powerful.

    For beginners, focusing on one primary element during early levels is usually the best approach. Splitting skill points too early can weaken your damage output and slow down progression.

    Early Skill Progression
    During the first few levels, the Sorceress starts with simple spells like Fire Bolt. This ability provides reliable early damage and can carry you through the opening areas of the game.

    Shortly afterward, players gain access to Fireball, one of the strongest early-game spells available to the Sorceress. Fireball deals solid damage and hits multiple enemies, making it extremely effective for clearing groups.

    Another important early skill is Warmth. This passive ability increases mana regeneration, which helps sustain continuous spellcasting. Because the Sorceress relies heavily on mana, investing a few points into Warmth can greatly improve overall gameplay.

    As you progress further, unlocking Teleport becomes a major milestone. Once Teleport becomes available, traveling across maps and escaping dangerous situations becomes significantly easier.

    Proper Attribute Allocation
    Each level grants attribute points that must be distributed among Strength, Dexterity, Vitality, and Energy. Making smart choices with these points is critical for building a strong Sorceress.

    Strength should only be increased when necessary to equip specific gear. Most Sorceress equipment does not require high Strength, so excessive investment here is usually wasteful.

    Dexterity generally provides little value for most Sorceress builds. Unless you are pursuing a specialized defensive strategy, Dexterity can typically be ignored.

    Energy increases the maximum mana pool. While mana is important for spellcasting, it is often better to rely on gear bonuses, potions, and Warmth rather than heavily investing in Energy.

    Vitality is the most important attribute for survivability. Because the Sorceress has low base health, adding points to Vitality significantly improves durability. Most players place the majority of their attribute points into Vitality to ensure they can survive tougher fights.

    Managing Mana and Potions
    Mana management is one of the biggest challenges for new Sorceress players. Casting spells frequently drains mana quickly, especially during long battles.

    Keeping a steady supply of mana potions in your belt is essential. These potions allow you to continue casting spells during combat without running out of resources.

    In addition to potions, certain gear bonuses can increase mana regeneration or reduce the cost of spells. These bonuses become especially valuable as you rely more heavily on powerful abilities later in the game.

    Warmth also plays an important role in mana sustainability, making it one of the most useful early passive skills.

    Gear Priorities for Sorceress
    Equipment plays a major role in improving the Sorceress’s power and survivability. When choosing gear, focus on items that enhance spellcasting abilities.

    One of the most valuable stats is increased skill levels. Items that provide bonuses to Sorceress skills or all skills significantly increase spell damage and effectiveness.

    Faster Cast Rate is another important stat. This reduces the delay between spells, allowing you to cast more frequently and deal damage faster.

    Resistances become increasingly important as you progress through the game. Enemies in later acts and higher difficulties deal large amounts of elemental damage. Without proper resistances, even strong characters can be defeated quickly.

    Mana regeneration, additional mana, and faster hit recovery are also helpful bonuses for Sorceress builds.

    The Importance of Mercenaries
    Mercenaries are companions that assist you during combat. You can hire them from certain NPCs throughout the game.

    For Sorceress players, mercenaries provide valuable frontline support. Because the Sorceress fights from a distance, having a companion who can absorb enemy attacks greatly improves survivability.

    Equipping your mercenary with strong armor and weapons allows them to withstand enemy damage while you cast spells safely behind them.

    Some mercenaries also provide beneficial aura effects that improve your character’s damage or defense.

    Learning Enemy Behavior
    As you progress through the campaign, enemies become more dangerous and begin using stronger abilities. Some monsters cast elemental spells, while others can resurrect fallen allies.

    Understanding which enemies pose the greatest threat allows you to prioritize targets effectively. Eliminating dangerous enemies first can prevent overwhelming situations.

    Positioning also plays a key role. Keeping enemies at a distance while using area-of-effect spells allows the Sorceress to control the battlefield and avoid unnecessary damage.

    Preparing for Higher Difficulties
    After completing the main campaign once, the game unlocks Nightmare and Hell difficulty modes. These difficulties dramatically increase enemy strength and introduce new challenges.

    The Sorceress in Endgame Farming
    One of the reasons the Sorceress remains so popular is her incredible farming efficiency. Thanks to Teleport and powerful spells, she can reach bosses faster than most other classes.

    Many players create a Sorceress specifically to farm valuable items, runes, and equipment that can be used by other characters. This makes her an excellent starting character when building wealth and resources in the game.

    Over time, farming runs become faster and more efficient as you acquire better gear and optimize your build.

    Final Thoughts
    Starting your adventure as a Sorceress in Diablo II: Resurrected is one of the most rewarding ways to experience the game. Her powerful elemental spells, unmatched mobility, and efficient farming capabilities make her a versatile and exciting character to play.

    While she may be fragile compared to other classes, proper planning and smart gameplay can turn the Sorceress into an unstoppable force. By focusing on strong early spells, prioritizing Vitality and resistances, and mastering Teleport, you can build a character capable of conquering even the toughest challenges in Sanctuary.

    For both newcomers and returning veterans, the Sorceress remains one of the most iconic and effective classes in the entire Diablo series. With the right strategy and a bit of practice, she can become the key to mastering the dark world of D2R Runes for sale.

    MMOexp.com boasts years of experience in the D2R Items industry and can guarantee to provide you with the highest quality service.

    D2R Items: Best Beginner Sorceress Setup Starting your journey in D2R Items can be both exciting and intimidating. The game retains the deep mechanics and unforgiving systems of the original classic, which means new players often need time to learn how everything works. Among all the available classes, the Sorceress stands out as one of the most popular starting characters. Her powerful elemental magic, incredible mobility, and efficient farming potential make her a favorite choice for beginners and veterans alike. However, the Sorceress is not without weaknesses. She is fragile, heavily dependent on mana, and requires smart positioning during combat. Understanding how to build and play the Sorceress properly from the beginning will dramatically improve your experience as you explore Sanctuary. This guide will walk you through the most important things to know when starting a Sorceress, including skill selection, attribute allocation, leveling strategies, gear priorities, and survival tactics. Why the Sorceress Is a Great Starting Class The Sorceress excels at ranged combat and elemental spellcasting. Unlike melee classes that must stand close to enemies, the Sorceress can eliminate monsters from a safe distance using devastating magical attacks. This ability to deal damage without exposing herself to constant danger makes her very effective during early gameplay. One of the biggest advantages of the Sorceress is her access to the Teleport ability. Teleport allows instant movement across the map, which dramatically increases travel speed and provides an escape option when surrounded by enemies. Because of this skill, Sorceresses are widely regarded as the fastest characters for farming bosses and valuable loot. Another reason players start with the Sorceress is her ability to clear large groups of enemies quickly. Many of her spells deal area-of-effect damage, allowing her to eliminate multiple monsters at once. This makes leveling faster and farming runs more efficient compared to many other classes. Despite these advantages, the Sorceress has low health and defense. A careless player can easily be overwhelmed if enemies get too close. Learning to maintain distance and control the battlefield is essential for survival. Understanding the Sorceress Skill Trees The Sorceress uses three elemental magic trees: Fire, Cold, and Lightning. Each tree offers a different combat style and unique strengths. Fire spells are known for their high damage output and explosive attacks. Abilities like Fireball and Meteor can deal massive damage to groups of enemies. Fire builds are popular for early leveling because they clear monsters quickly. Cold spells emphasize control and safety. Many cold abilities slow or freeze enemies, giving the Sorceress more time to reposition or escape danger. Blizzard, Frozen Orb, and other cold skills are extremely powerful in both early and late gameplay. Lightning spells offer high potential damage but are less predictable because lightning abilities often have wide damage ranges. Skills like Chain Lightning can clear large groups of enemies rapidly but require more investment to become truly powerful. For beginners, focusing on one primary element during early levels is usually the best approach. Splitting skill points too early can weaken your damage output and slow down progression. Early Skill Progression During the first few levels, the Sorceress starts with simple spells like Fire Bolt. This ability provides reliable early damage and can carry you through the opening areas of the game. Shortly afterward, players gain access to Fireball, one of the strongest early-game spells available to the Sorceress. Fireball deals solid damage and hits multiple enemies, making it extremely effective for clearing groups. Another important early skill is Warmth. This passive ability increases mana regeneration, which helps sustain continuous spellcasting. Because the Sorceress relies heavily on mana, investing a few points into Warmth can greatly improve overall gameplay. As you progress further, unlocking Teleport becomes a major milestone. Once Teleport becomes available, traveling across maps and escaping dangerous situations becomes significantly easier. Proper Attribute Allocation Each level grants attribute points that must be distributed among Strength, Dexterity, Vitality, and Energy. Making smart choices with these points is critical for building a strong Sorceress. Strength should only be increased when necessary to equip specific gear. Most Sorceress equipment does not require high Strength, so excessive investment here is usually wasteful. Dexterity generally provides little value for most Sorceress builds. Unless you are pursuing a specialized defensive strategy, Dexterity can typically be ignored. Energy increases the maximum mana pool. While mana is important for spellcasting, it is often better to rely on gear bonuses, potions, and Warmth rather than heavily investing in Energy. Vitality is the most important attribute for survivability. Because the Sorceress has low base health, adding points to Vitality significantly improves durability. Most players place the majority of their attribute points into Vitality to ensure they can survive tougher fights. Managing Mana and Potions Mana management is one of the biggest challenges for new Sorceress players. Casting spells frequently drains mana quickly, especially during long battles. Keeping a steady supply of mana potions in your belt is essential. These potions allow you to continue casting spells during combat without running out of resources. In addition to potions, certain gear bonuses can increase mana regeneration or reduce the cost of spells. These bonuses become especially valuable as you rely more heavily on powerful abilities later in the game. Warmth also plays an important role in mana sustainability, making it one of the most useful early passive skills. Gear Priorities for Sorceress Equipment plays a major role in improving the Sorceress’s power and survivability. When choosing gear, focus on items that enhance spellcasting abilities. One of the most valuable stats is increased skill levels. Items that provide bonuses to Sorceress skills or all skills significantly increase spell damage and effectiveness. Faster Cast Rate is another important stat. This reduces the delay between spells, allowing you to cast more frequently and deal damage faster. Resistances become increasingly important as you progress through the game. Enemies in later acts and higher difficulties deal large amounts of elemental damage. Without proper resistances, even strong characters can be defeated quickly. Mana regeneration, additional mana, and faster hit recovery are also helpful bonuses for Sorceress builds. The Importance of Mercenaries Mercenaries are companions that assist you during combat. You can hire them from certain NPCs throughout the game. For Sorceress players, mercenaries provide valuable frontline support. Because the Sorceress fights from a distance, having a companion who can absorb enemy attacks greatly improves survivability. Equipping your mercenary with strong armor and weapons allows them to withstand enemy damage while you cast spells safely behind them. Some mercenaries also provide beneficial aura effects that improve your character’s damage or defense. Learning Enemy Behavior As you progress through the campaign, enemies become more dangerous and begin using stronger abilities. Some monsters cast elemental spells, while others can resurrect fallen allies. Understanding which enemies pose the greatest threat allows you to prioritize targets effectively. Eliminating dangerous enemies first can prevent overwhelming situations. Positioning also plays a key role. Keeping enemies at a distance while using area-of-effect spells allows the Sorceress to control the battlefield and avoid unnecessary damage. Preparing for Higher Difficulties After completing the main campaign once, the game unlocks Nightmare and Hell difficulty modes. These difficulties dramatically increase enemy strength and introduce new challenges. The Sorceress in Endgame Farming One of the reasons the Sorceress remains so popular is her incredible farming efficiency. Thanks to Teleport and powerful spells, she can reach bosses faster than most other classes. Many players create a Sorceress specifically to farm valuable items, runes, and equipment that can be used by other characters. This makes her an excellent starting character when building wealth and resources in the game. Over time, farming runs become faster and more efficient as you acquire better gear and optimize your build. Final Thoughts Starting your adventure as a Sorceress in Diablo II: Resurrected is one of the most rewarding ways to experience the game. Her powerful elemental spells, unmatched mobility, and efficient farming capabilities make her a versatile and exciting character to play. While she may be fragile compared to other classes, proper planning and smart gameplay can turn the Sorceress into an unstoppable force. By focusing on strong early spells, prioritizing Vitality and resistances, and mastering Teleport, you can build a character capable of conquering even the toughest challenges in Sanctuary. For both newcomers and returning veterans, the Sorceress remains one of the most iconic and effective classes in the entire Diablo series. With the right strategy and a bit of practice, she can become the key to mastering the dark world of D2R Runes for sale. MMOexp.com boasts years of experience in the D2R Items industry and can guarantee to provide you with the highest quality service.
    ·356 Vues ·0 Avis
  • Ashes of Creation Gold: Beginner Tips to Level Smarter

    Ashes of Creation Gold is an ambitious MMORPG that seeks to redefine the genre with a player-driven world, dynamic node systems, and a deep economic and crafting infrastructure. The game is set in the richly detailed land of Verra, where every decision a player makes can influence the development of cities, the flow of commerce, and even the balance of power between factions. For new players, this can feel both exciting and overwhelming. Understanding the core mechanics, prioritizing your progression, and engaging with the community are crucial to making the most of your experience. This guide provides essential tips to help new adventurers start strong in Ashes of Creation.

    1. Embrace the Player-Driven World

    Unlike traditional MMOs that funnel players through linear questing, Ashes of Creation emphasizes player agency. The world evolves based on player actions: nodes grow into towns and cities, roads and infrastructure are built, and economies emerge organically. Understanding this is essential for newcomers. Your contributions to quests, resource gathering, crafting, and combat affect the development of nodes and, by extension, the entire game world.

    Being mindful of your impact on the ecosystem—through your actions, reputation, and alliances—will help you navigate the game more effectively. Early participation in node development can provide long-term advantages such as access to unique vendors, crafting stations, and special quests.

    2. Choose Your Starting Region Carefully

    When creating your character, your choice of server and starting zone can influence your early experience. Latency is crucial; pick a server that provides a stable connection. Playing on a server where friends are present enhances opportunities for group activities, resource sharing, and protection during PvP encounters.

    Each starting region has its own flavor. Some areas provide structured quests with clear objectives, while others encourage exploration and self-directed discovery. Choosing a starting region that aligns with your playstyle—whether you prefer a guided experience or an open-world adventure—can help ease the learning curve.

    3. Complete Early Quests Thoroughly

    The initial quests in Ashes of Creation are not just a means to gain experience; they are designed to introduce core game systems. Early missions teach players about combat mechanics, gathering, crafting, navigation, and inventory management. Completing these quests thoroughly ensures that you acquire basic equipment, resources, and knowledge essential for survival and growth.

    Focusing on early quest lines before abandoning them for grind-heavy activities is important. These quests often provide tools, weapons, and mounts that make subsequent gameplay smoother. Additionally, early questing familiarizes you with the local geography and important NPCs, which will be helpful in both solo and group content.

    4. Invest Time in Understanding Combat and Skills

    Combat in Ashes of Creation is action-oriented and strategic. Players equip two weapons simultaneously, each with its own skill progression. Experimenting with different weapon types early allows you to find a combination that suits your playstyle.

    Skill points are earned regularly as you level, and spending them wisely is critical. Prioritize skills that enhance survivability, mobility, and utility, in addition to damage output. Avoid hoarding points for later levels, as using them immediately can improve your effectiveness in early-game combat and group encounters.

    5. Utilize Mounts Effectively

    Mounts are an essential part of traversing the expansive world of Verra. Without a mount, traveling long distances is slow and exposes you to dangers, including PvP attacks and environmental hazards. Acquire your first mount as soon as possible and consider maintaining multiple mounts for backup.

    Different mounts serve different purposes. While land mounts are sufficient for most areas, water mounts or specialized mounts may be required for certain terrains. Treat mounts as valuable resources—they are not easily replaceable and can be crucial for survival in both solo and group scenarios.

    6. Approach Gear and Equipment Strategically

    Early gear in Ashes of Creation is obtained through a combination of quests, dungeon runs, and crafting. Pocket dungeons and small group activities can drop useful equipment, but crafting is often a more reliable way to obtain gear suited to your class.

    Prioritize crafting early by learning basic professions and gathering materials from your surroundings. Crafting your own weapons and armor allows you to control your progression and ensures your equipment matches your playstyle. Always monitor durability, as neglected gear can slow progression and leave you vulnerable in combat.

    7. Learn the Gathering, Processing, and Crafting Cycle

    Professions are not optional side activities; they are integral to your success in Ashes of Creation. Gathering raw materials from nodes, processing them into usable resources, and crafting equipment or consumables form a continuous loop that drives both personal progression and the game’s economy.

    Select at least one gathering profession and a corresponding processing skill early. Whether it is lumber milling, metalworking, tailoring, or cooking, mastering these skills ensures you can create essential items and potentially profit by selling resources to other players. Skilled crafters often find themselves in demand within their community, making these skills an indirect path to influence and survival.

    8. Manage Inventory and Currency Wisely

    Inventory management is critical in Ashes of Creation. Resources, loot, and crafting materials can accumulate quickly, so plan your carrying capacity and storage solutions carefully. Make use of storage chests within nodes to safeguard valuable items.

    Currency, including gold and Glint, is earned through combat, gathering, and quests. Avoid spending all currency impulsively; some of it may be needed later for crafting, caravan supplies, or node contributions. Efficient financial management allows you to maximize your benefits from the game’s economy and participate more fully in group activities.

    9. Engage in Node Commissions Daily

    Every node features commission boards offering a variety of tasks—adventuring, hunting, or artisan work. These commissions provide rewards such as experience, currency, and materials while directly contributing to node development.

    Regular participation in commissions not only advances your character but also helps your community grow. Nodes with active player engagement evolve faster, unlocking additional services and infrastructure. By completing commissions consistently, you enhance both your personal progression and the collective capabilities of your faction.

    10. Join a Guild Early

    Guilds are more than social groups; they are critical to survival and advancement. Being part of a guild provides access to coordinated activities such as caravan runs, group dungeons, PvP engagements, and resource sharing. Guilds also offer strategic advantages, including collective knowledge of the world, shared crafting resources, and guild-specific perks.

    Early membership in a guild helps you navigate the challenges of the world, gain allies, and participate in large-scale events that solo players may find difficult to tackle.

    Conclusion

    Starting out in Ashes of Creation can be a daunting experience due to its complexity and player-driven mechanics. However, by understanding the game’s systems, approaching combat and crafting strategically, participating in node development, and engaging with the community, new players can quickly establish a strong foundation.

    Key habits such as effective inventory and currency management, daily participation in commissions, mastering gathering and crafting, and joining a guild early will enhance your journey. The world of Verra is dynamic and responsive, rewarding thoughtful and engaged play. By following these essential tips, new players can navigate the challenges, enjoy meaningful progression, and contribute to a vibrant and buy AoC Gold.

    MMOEXP The purchase of Ashes of Creation Gold was really fast, will definitely only use this website in the future. The live chat was also very helpful.

    Ashes of Creation Gold: Beginner Tips to Level Smarter Ashes of Creation Gold is an ambitious MMORPG that seeks to redefine the genre with a player-driven world, dynamic node systems, and a deep economic and crafting infrastructure. The game is set in the richly detailed land of Verra, where every decision a player makes can influence the development of cities, the flow of commerce, and even the balance of power between factions. For new players, this can feel both exciting and overwhelming. Understanding the core mechanics, prioritizing your progression, and engaging with the community are crucial to making the most of your experience. This guide provides essential tips to help new adventurers start strong in Ashes of Creation. 1. Embrace the Player-Driven World Unlike traditional MMOs that funnel players through linear questing, Ashes of Creation emphasizes player agency. The world evolves based on player actions: nodes grow into towns and cities, roads and infrastructure are built, and economies emerge organically. Understanding this is essential for newcomers. Your contributions to quests, resource gathering, crafting, and combat affect the development of nodes and, by extension, the entire game world. Being mindful of your impact on the ecosystem—through your actions, reputation, and alliances—will help you navigate the game more effectively. Early participation in node development can provide long-term advantages such as access to unique vendors, crafting stations, and special quests. 2. Choose Your Starting Region Carefully When creating your character, your choice of server and starting zone can influence your early experience. Latency is crucial; pick a server that provides a stable connection. Playing on a server where friends are present enhances opportunities for group activities, resource sharing, and protection during PvP encounters. Each starting region has its own flavor. Some areas provide structured quests with clear objectives, while others encourage exploration and self-directed discovery. Choosing a starting region that aligns with your playstyle—whether you prefer a guided experience or an open-world adventure—can help ease the learning curve. 3. Complete Early Quests Thoroughly The initial quests in Ashes of Creation are not just a means to gain experience; they are designed to introduce core game systems. Early missions teach players about combat mechanics, gathering, crafting, navigation, and inventory management. Completing these quests thoroughly ensures that you acquire basic equipment, resources, and knowledge essential for survival and growth. Focusing on early quest lines before abandoning them for grind-heavy activities is important. These quests often provide tools, weapons, and mounts that make subsequent gameplay smoother. Additionally, early questing familiarizes you with the local geography and important NPCs, which will be helpful in both solo and group content. 4. Invest Time in Understanding Combat and Skills Combat in Ashes of Creation is action-oriented and strategic. Players equip two weapons simultaneously, each with its own skill progression. Experimenting with different weapon types early allows you to find a combination that suits your playstyle. Skill points are earned regularly as you level, and spending them wisely is critical. Prioritize skills that enhance survivability, mobility, and utility, in addition to damage output. Avoid hoarding points for later levels, as using them immediately can improve your effectiveness in early-game combat and group encounters. 5. Utilize Mounts Effectively Mounts are an essential part of traversing the expansive world of Verra. Without a mount, traveling long distances is slow and exposes you to dangers, including PvP attacks and environmental hazards. Acquire your first mount as soon as possible and consider maintaining multiple mounts for backup. Different mounts serve different purposes. While land mounts are sufficient for most areas, water mounts or specialized mounts may be required for certain terrains. Treat mounts as valuable resources—they are not easily replaceable and can be crucial for survival in both solo and group scenarios. 6. Approach Gear and Equipment Strategically Early gear in Ashes of Creation is obtained through a combination of quests, dungeon runs, and crafting. Pocket dungeons and small group activities can drop useful equipment, but crafting is often a more reliable way to obtain gear suited to your class. Prioritize crafting early by learning basic professions and gathering materials from your surroundings. Crafting your own weapons and armor allows you to control your progression and ensures your equipment matches your playstyle. Always monitor durability, as neglected gear can slow progression and leave you vulnerable in combat. 7. Learn the Gathering, Processing, and Crafting Cycle Professions are not optional side activities; they are integral to your success in Ashes of Creation. Gathering raw materials from nodes, processing them into usable resources, and crafting equipment or consumables form a continuous loop that drives both personal progression and the game’s economy. Select at least one gathering profession and a corresponding processing skill early. Whether it is lumber milling, metalworking, tailoring, or cooking, mastering these skills ensures you can create essential items and potentially profit by selling resources to other players. Skilled crafters often find themselves in demand within their community, making these skills an indirect path to influence and survival. 8. Manage Inventory and Currency Wisely Inventory management is critical in Ashes of Creation. Resources, loot, and crafting materials can accumulate quickly, so plan your carrying capacity and storage solutions carefully. Make use of storage chests within nodes to safeguard valuable items. Currency, including gold and Glint, is earned through combat, gathering, and quests. Avoid spending all currency impulsively; some of it may be needed later for crafting, caravan supplies, or node contributions. Efficient financial management allows you to maximize your benefits from the game’s economy and participate more fully in group activities. 9. Engage in Node Commissions Daily Every node features commission boards offering a variety of tasks—adventuring, hunting, or artisan work. These commissions provide rewards such as experience, currency, and materials while directly contributing to node development. Regular participation in commissions not only advances your character but also helps your community grow. Nodes with active player engagement evolve faster, unlocking additional services and infrastructure. By completing commissions consistently, you enhance both your personal progression and the collective capabilities of your faction. 10. Join a Guild Early Guilds are more than social groups; they are critical to survival and advancement. Being part of a guild provides access to coordinated activities such as caravan runs, group dungeons, PvP engagements, and resource sharing. Guilds also offer strategic advantages, including collective knowledge of the world, shared crafting resources, and guild-specific perks. Early membership in a guild helps you navigate the challenges of the world, gain allies, and participate in large-scale events that solo players may find difficult to tackle. Conclusion Starting out in Ashes of Creation can be a daunting experience due to its complexity and player-driven mechanics. However, by understanding the game’s systems, approaching combat and crafting strategically, participating in node development, and engaging with the community, new players can quickly establish a strong foundation. Key habits such as effective inventory and currency management, daily participation in commissions, mastering gathering and crafting, and joining a guild early will enhance your journey. The world of Verra is dynamic and responsive, rewarding thoughtful and engaged play. By following these essential tips, new players can navigate the challenges, enjoy meaningful progression, and contribute to a vibrant and buy AoC Gold. MMOEXP The purchase of Ashes of Creation Gold was really fast, will definitely only use this website in the future. The live chat was also very helpful.
    ·656 Vues ·0 Avis
  • https://tophealthcoach.blog/how-to-lose-belly-fat-at-home-without-gym/
    Losing stubborn belly fat at home may feel difficult. However, it can be achieved with the right strategy. In this health Blog, a simple and practical step-by-step Lose Belly Fat method is explained. No gym is required. No expensive equipment is needed. Only consistency is demanded.
    https://tophealthcoach.blog/how-to-lose-belly-fat-at-home-without-gym/ Losing stubborn belly fat at home may feel difficult. However, it can be achieved with the right strategy. In this health Blog, a simple and practical step-by-step Lose Belly Fat method is explained. No gym is required. No expensive equipment is needed. Only consistency is demanded.
    TOPHEALTHCOACH.BLOG
    How to Lose Belly Fat at Home Without Gym (Step-by-Step)
    Learn how to lose belly fat at home without a gym using simple diet plans, home workouts, and daily habits for safe, fast, and effective results.
    ·133 Vues ·0 Avis
  • Buy Rod Pod Carp

    https://questtackle.com/product/quest-trilogy-sticks/

    Quest Tackle offers dependable alternatives for serious anglers looking to purchase Rod Pod Carp equipment that guarantees strength and adjustability. Enhance your fishing experience. Today, shop with assurance.

    #buyrodpodcarp

    Buy Rod Pod Carp https://questtackle.com/product/quest-trilogy-sticks/ Quest Tackle offers dependable alternatives for serious anglers looking to purchase Rod Pod Carp equipment that guarantees strength and adjustability. Enhance your fishing experience. Today, shop with assurance. #buyrodpodcarp
    ·108 Vues ·0 Avis
  • D2R Items Tips for a Smooth Start

    Few action RPGs have had as much long-lasting influence as D2R Items. When Diablo II: Resurrected launched, it brought the legendary 2000 classic back with modern graphics, smoother animations, and updated quality-of-life features while preserving the original mechanics that made the game so beloved. For many players, the remaster is both nostalgic and brutally challenging. Unlike many modern ARPGs, Diablo II rewards preparation, careful planning, and patience rather than quick experimentation.

    If you’re planning to jump into the dark world of Sanctuary for the first time—or returning after many years—there are several key things you should understand before beginning your adventure. Learning these systems early will save you from frustration and help you progress smoothly through the game’s increasingly difficult challenges.

    Choose Your Class Carefully
    At the beginning of the game, you’ll choose one of several playable classes. Each class has its own abilities, skill trees, and combat style. Your options include the Amazon, Sorceress, Necromancer, Paladin, Barbarian, Druid, and Assassin.

    Each class plays very differently. The Sorceress specializes in powerful elemental magic, making her excellent for dealing large amounts of damage from a distance. The Barbarian is a melee powerhouse who relies on physical strength and durability. Meanwhile, the Necromancer can summon skeletons and other minions to fight on his behalf.

    What makes class choice particularly important is the skill system. Each level grants skill points that must be placed into abilities across three different skill trees. Although the game offers limited ways to reset your skill points, respec opportunities are not unlimited. This means poorly planned builds can make later difficulties significantly harder.

    Because of this, many experienced players recommend researching a build before committing too heavily to a skill tree. Having a long-term plan ensures your character will remain effective as enemies grow stronger in later acts and difficulties.

    Attribute Allocation Is More Important Than You Think
    Every time you level up, you also gain attribute points. These points can be assigned to four core stats: Strength, Dexterity, Vitality, and Energy.

    New players often make the mistake of spreading these points evenly across all attributes. While this might seem balanced, it usually results in a weaker character overall. Instead, most builds prioritize Vitality because it increases your health pool and helps you survive tougher fights.

    Strength and Dexterity should typically be increased only when necessary to equip certain weapons or armor. Energy increases mana, but most characters gain enough mana from equipment or potions that heavy investment isn’t required.

    Understanding how attributes affect your character is crucial. A poorly allocated stat distribution can significantly reduce your survivability, especially when facing bosses or elite monsters.

    Resistances Are Essential for Survival
    One of the most important defensive mechanics in the game is elemental resistance. Your character can resist four types of elemental damage: fire, cold, lightning, and poison.

    Early in the game, resistances might not seem particularly important. However, as you progress through the campaign, enemies begin using increasingly powerful elemental attacks. Without proper resistance gear, some monsters can eliminate your character in seconds.

    The situation becomes even more challenging in Nightmare and Hell difficulties. These modes impose resistance penalties that drastically lower your base resistances. To compensate, players must rely on equipment that boosts elemental resistance.

    For this reason, experienced players often prioritize gear that increases resistances rather than focusing purely on offensive stats.

    Death Comes With Real Consequences
    Unlike many modern RPGs, dying in Diablo II has meaningful consequences. When your character dies, your equipment remains on your corpse at the location where you fell. You respawn in town with nothing equipped and must return to your body to retrieve your items.

    This mechanic can lead to tense moments. If you died in a dangerous area filled with enemies, you may need to carefully fight your way back to recover your gear.

    The game also offers a Hardcore mode for players seeking an even greater challenge. In Hardcore mode, death is permanent. If your character dies, the entire character is lost forever.

    This high-risk gameplay adds intensity to every encounter and makes survival strategies extremely important.

    Inventory Management Is a Skill
    The inventory system in Diablo II is intentionally restrictive. Items take up different amounts of space depending on their size, which means your inventory fills quickly.

    To manage this effectively, you should acquire important utility items early in the game. The Tome of Town Portal and Tome of Identify are two of the most useful purchases you can make from early vendors. These tomes hold multiple scrolls while occupying only a small amount of space.

    Town Portal scrolls allow you to instantly open a portal back to town, giving you a quick escape from dangerous situations or a convenient way to sell items and repair equipment.

    Eventually, you will also meet Deckard Cain, a wise scholar who can identify magical items for you without requiring identify scrolls. His presence makes item management far easier.

    Learn to Use the Horadric Cube
    One of the most important items in the entire game is the Horadric Cube. You obtain this artifact during the early stages of Act II, and it quickly becomes an essential tool.

    The cube functions as both a crafting device and additional storage space. Players can combine items inside it to create new ones. For example, three lower-tier gems can be combined into a higher-tier gem.

    Runes can also be upgraded through cube recipes, and certain crafting formulas allow players to create powerful gear with unique properties.

    Mastering Horadric Cube recipes opens the door to advanced item crafting and is a crucial step toward optimizing your character’s equipment.

    Runewords Are Some of the Best Items in the Game
    Runewords are among the most powerful gear options available in the game. They are created by placing specific runes into socketed equipment in a precise order.

    When the correct combination is used, the item transforms into a Runeword and gains powerful bonuses. These bonuses can include massive stat boosts, new abilities, faster casting speed, or even teleportation.

    However, Runewords only work when placed in normal socketed items. If the item is magical, rare, or unique, the runeword will not activate.

    Because of this rule, players must carefully choose the base item before inserting runes. Learning which item bases are ideal for certain runewords is a major part of the game’s deep itemization system.

    Mercenaries Can Carry Your Character
    Mercenaries are AI companions that assist you in combat. You first gain access to one early in the game, and additional types become available in later acts.

    These companions are far more useful than they might initially appear. Mercenaries can equip weapons, armor, and helmets, making them surprisingly strong when properly geared.

    Some mercenaries also provide passive aura bonuses that enhance your character’s abilities. For example, certain mercenaries can boost attack speed, defense, or damage output.

    A well-equipped mercenary can tank enemies, deal additional damage, and help you handle difficult encounters that might otherwise overwhelm your character.

    Grinding Is Part of the Experience
    One of the defining aspects of Diablo II is item farming. Unlike story-focused RPGs, this game is built around repeated runs through specific areas to obtain better gear.

    Players frequently farm certain bosses, elite monsters, or locations known for good loot drops. Over time, these runs gradually improve your character’s equipment and power level.

    While this process can feel repetitive to some players, it is also one of the most satisfying aspects of the game. The excitement of finally finding a rare item after dozens of runs is a major part of Diablo II’s appeal.

    Final Thoughts
    Despite being more than two decades old, the core gameplay of Diablo II remains remarkably deep and engaging. Diablo II: Resurrected preserves everything that made the original game legendary while modernizing its visuals and performance.

    With patience, strategy, and a bit of cheap D2R Items, you’ll soon find yourself fully immersed in the addictive cycle of monster slaying, treasure hunting, and character progression that has kept players returning to Diablo II for decades.

    MMOexp.com boasts years of experience in the D2R Items industry and can guarantee to provide you with the highest quality service.

    D2R Items Tips for a Smooth Start Few action RPGs have had as much long-lasting influence as D2R Items. When Diablo II: Resurrected launched, it brought the legendary 2000 classic back with modern graphics, smoother animations, and updated quality-of-life features while preserving the original mechanics that made the game so beloved. For many players, the remaster is both nostalgic and brutally challenging. Unlike many modern ARPGs, Diablo II rewards preparation, careful planning, and patience rather than quick experimentation. If you’re planning to jump into the dark world of Sanctuary for the first time—or returning after many years—there are several key things you should understand before beginning your adventure. Learning these systems early will save you from frustration and help you progress smoothly through the game’s increasingly difficult challenges. Choose Your Class Carefully At the beginning of the game, you’ll choose one of several playable classes. Each class has its own abilities, skill trees, and combat style. Your options include the Amazon, Sorceress, Necromancer, Paladin, Barbarian, Druid, and Assassin. Each class plays very differently. The Sorceress specializes in powerful elemental magic, making her excellent for dealing large amounts of damage from a distance. The Barbarian is a melee powerhouse who relies on physical strength and durability. Meanwhile, the Necromancer can summon skeletons and other minions to fight on his behalf. What makes class choice particularly important is the skill system. Each level grants skill points that must be placed into abilities across three different skill trees. Although the game offers limited ways to reset your skill points, respec opportunities are not unlimited. This means poorly planned builds can make later difficulties significantly harder. Because of this, many experienced players recommend researching a build before committing too heavily to a skill tree. Having a long-term plan ensures your character will remain effective as enemies grow stronger in later acts and difficulties. Attribute Allocation Is More Important Than You Think Every time you level up, you also gain attribute points. These points can be assigned to four core stats: Strength, Dexterity, Vitality, and Energy. New players often make the mistake of spreading these points evenly across all attributes. While this might seem balanced, it usually results in a weaker character overall. Instead, most builds prioritize Vitality because it increases your health pool and helps you survive tougher fights. Strength and Dexterity should typically be increased only when necessary to equip certain weapons or armor. Energy increases mana, but most characters gain enough mana from equipment or potions that heavy investment isn’t required. Understanding how attributes affect your character is crucial. A poorly allocated stat distribution can significantly reduce your survivability, especially when facing bosses or elite monsters. Resistances Are Essential for Survival One of the most important defensive mechanics in the game is elemental resistance. Your character can resist four types of elemental damage: fire, cold, lightning, and poison. Early in the game, resistances might not seem particularly important. However, as you progress through the campaign, enemies begin using increasingly powerful elemental attacks. Without proper resistance gear, some monsters can eliminate your character in seconds. The situation becomes even more challenging in Nightmare and Hell difficulties. These modes impose resistance penalties that drastically lower your base resistances. To compensate, players must rely on equipment that boosts elemental resistance. For this reason, experienced players often prioritize gear that increases resistances rather than focusing purely on offensive stats. Death Comes With Real Consequences Unlike many modern RPGs, dying in Diablo II has meaningful consequences. When your character dies, your equipment remains on your corpse at the location where you fell. You respawn in town with nothing equipped and must return to your body to retrieve your items. This mechanic can lead to tense moments. If you died in a dangerous area filled with enemies, you may need to carefully fight your way back to recover your gear. The game also offers a Hardcore mode for players seeking an even greater challenge. In Hardcore mode, death is permanent. If your character dies, the entire character is lost forever. This high-risk gameplay adds intensity to every encounter and makes survival strategies extremely important. Inventory Management Is a Skill The inventory system in Diablo II is intentionally restrictive. Items take up different amounts of space depending on their size, which means your inventory fills quickly. To manage this effectively, you should acquire important utility items early in the game. The Tome of Town Portal and Tome of Identify are two of the most useful purchases you can make from early vendors. These tomes hold multiple scrolls while occupying only a small amount of space. Town Portal scrolls allow you to instantly open a portal back to town, giving you a quick escape from dangerous situations or a convenient way to sell items and repair equipment. Eventually, you will also meet Deckard Cain, a wise scholar who can identify magical items for you without requiring identify scrolls. His presence makes item management far easier. Learn to Use the Horadric Cube One of the most important items in the entire game is the Horadric Cube. You obtain this artifact during the early stages of Act II, and it quickly becomes an essential tool. The cube functions as both a crafting device and additional storage space. Players can combine items inside it to create new ones. For example, three lower-tier gems can be combined into a higher-tier gem. Runes can also be upgraded through cube recipes, and certain crafting formulas allow players to create powerful gear with unique properties. Mastering Horadric Cube recipes opens the door to advanced item crafting and is a crucial step toward optimizing your character’s equipment. Runewords Are Some of the Best Items in the Game Runewords are among the most powerful gear options available in the game. They are created by placing specific runes into socketed equipment in a precise order. When the correct combination is used, the item transforms into a Runeword and gains powerful bonuses. These bonuses can include massive stat boosts, new abilities, faster casting speed, or even teleportation. However, Runewords only work when placed in normal socketed items. If the item is magical, rare, or unique, the runeword will not activate. Because of this rule, players must carefully choose the base item before inserting runes. Learning which item bases are ideal for certain runewords is a major part of the game’s deep itemization system. Mercenaries Can Carry Your Character Mercenaries are AI companions that assist you in combat. You first gain access to one early in the game, and additional types become available in later acts. These companions are far more useful than they might initially appear. Mercenaries can equip weapons, armor, and helmets, making them surprisingly strong when properly geared. Some mercenaries also provide passive aura bonuses that enhance your character’s abilities. For example, certain mercenaries can boost attack speed, defense, or damage output. A well-equipped mercenary can tank enemies, deal additional damage, and help you handle difficult encounters that might otherwise overwhelm your character. Grinding Is Part of the Experience One of the defining aspects of Diablo II is item farming. Unlike story-focused RPGs, this game is built around repeated runs through specific areas to obtain better gear. Players frequently farm certain bosses, elite monsters, or locations known for good loot drops. Over time, these runs gradually improve your character’s equipment and power level. While this process can feel repetitive to some players, it is also one of the most satisfying aspects of the game. The excitement of finally finding a rare item after dozens of runs is a major part of Diablo II’s appeal. Final Thoughts Despite being more than two decades old, the core gameplay of Diablo II remains remarkably deep and engaging. Diablo II: Resurrected preserves everything that made the original game legendary while modernizing its visuals and performance. With patience, strategy, and a bit of cheap D2R Items, you’ll soon find yourself fully immersed in the addictive cycle of monster slaying, treasure hunting, and character progression that has kept players returning to Diablo II for decades. MMOexp.com boasts years of experience in the D2R Items industry and can guarantee to provide you with the highest quality service.
    ·994 Vues ·0 Avis
  • Ashes of Creation Gold: Mastering Tank Builds

    In the expansive world of Ashes of Creation Gold, players are introduced to a dynamic and ever-changing landscape where every role plays a pivotal part in the success of a group. The tank role, in particular, is a cornerstone in both PvE (Player vs Environment) and PvP (Player vs Player) content. As a tank, your primary responsibility is to absorb incoming damage, control the battlefield, and ensure that your allies remain unharmed. This comprehensive guide will walk you through the essentials of building a tank in Ashes of Creation, focusing on key mechanics, attributes, abilities, gear, and strategies to help you excel in the role.

    Understanding the Tank Role

    Before delving into the specifics of tanking in Ashes of Creation, it’s essential to understand what being a tank entails. The tank’s role is both simple and complex at the same time. A tank’s primary function is to act as the damage sponge for the group, absorbing hits that would otherwise fall on weaker members of the party. Tanks are tasked with keeping enemies focused on them, allowing damage dealers to unleash their full potential without fear of being targeted.

    The tank also controls crowd flow, meaning that they need to manage enemy positions, prevent stragglers from flanking, and control aggro, which is the threat that enemies feel toward a player. This threat can be manipulated using taunts, threat-generating abilities, and strategic positioning. Tanks are often the first line of defense in high-stakes encounters like raids, dungeons, or PvP battles, where managing incoming damage and controlling enemy movement is vital to the group’s survival.

    Choosing the Right Class

    The next step in crafting a tank build is selecting the appropriate archetype and advanced class. In Ashes of Creation, the class system is structured around Archetypes and Specializations. When it comes to tanking, the Knight archetype is the most viable option, as it is designed with high survivability and threat management in mind.

    Knight Archetype

    The Knight is a versatile archetype, well-suited to tanking roles due to its inherent defensive capabilities. A Knight can specialize into several classes, each bringing a unique approach to tanking. The three main specializations available to the Knight archetype are:

    Paladin: The Paladin is a defensive support tank, offering strong self-healing abilities, damage mitigation, and group support through buffs and debuffs. Paladins can keep themselves and their allies alive in prolonged fights, making them an excellent choice for sustained encounters.

    Guardian: Guardians are the classic “big, tough tank.” They focus on soaking up massive amounts of damage and controlling enemy movement. Their strength lies in their ability to lock down enemies with crowd control (CC) abilities and their formidable damage mitigation.

    Warlord: A more offensive tanking class, the Warlord excels at controlling multiple enemies simultaneously. While they may not have as much raw damage mitigation as the Guardian or Paladin, their ability to contribute damage while still keeping enemies focused on them makes them a flexible option for both tanking and dealing damage.

    For this guide, we will focus primarily on the Paladin specialization, as it is a popular choice for players who enjoy tanking while also providing support to their team.

    Key Attributes for Tanking

    When building a tank in Ashes of Creation, the right set of attributes is vital for ensuring you can withstand damage and perform your role effectively. The game uses a stat-based system, and certain attributes should be prioritized for tanking:

    1. Constitution

    Constitution is one of the most important stats for a tank. It directly affects your health pool and survivability. A tank needs to have a substantial amount of health to endure sustained damage in both PvE and PvP. A higher Constitution allows you to soak more damage and survive longer, making you the effective damage sponge your team needs.

    2. Endurance

    Endurance increases your stamina and your ability to block or mitigate incoming attacks. While Constitution boosts your overall health, Endurance helps with your damage reduction capabilities. It’s especially important for Paladins, who will be using abilities like Shield Wall and other damage mitigation skills. Ensuring that your Endurance is high enough will allow you to sustain these abilities longer and help with mobility, so you can reposition quickly if needed.

    3. Armor

    Armor is a crucial factor in reducing physical damage. As a tank, your job is to absorb as much damage as possible, and a higher Armor rating will make you more resilient against physical attacks. In many cases, the best gear for a tank will be heavy armor, as it provides the highest level of damage reduction.

    4. Agility

    While Agility isn’t a tank’s primary focus, a moderate amount of it can be useful for mobility. Agility improves your dodge chance, allowing you to avoid some attacks, especially in high-paced PvP encounters or against bosses with fast-moving abilities. While you should not neglect more vital stats like Constitution and Endurance, having a bit of Agility can improve your overall survivability in certain situations.

    Tank Abilities and Skills

    Every tank must have a well-rounded set of abilities that allow them to control aggro, mitigate damage, and protect their allies. Here are some key abilities you should focus on when building a tank:

    1. Taunt Abilities

    Taunts are core to a tank’s ability to manage aggro. These abilities force enemies to focus their attacks on the tank instead of other party members. Effective taunting abilities not only generate threat but can also increase the tank’s control over the battlefield, ensuring that damage dealers and healers remain unharmed.

    Aggro Generation: Your taunt abilities should be used to pull enemies off your damage dealers. Be mindful of the threat generated by your DPS—if they surpass you in damage output, it could cause the enemy to switch targets.

    Area-of-Effect Taunts: Some taunts have a broader range, allowing you to gather multiple enemies and keep them under your control. These are particularly useful in dungeon runs or group combat.

    2. Defensive Abilities

    The foundation of any tank is their ability to absorb damage. Defensive abilities provide crucial damage mitigation, allowing tanks to take hits that would otherwise wipe out squishy party members.

    Shield Wall: This ability significantly reduces the amount of damage taken over a short period, making it indispensable in high-damage phases of a fight.

    Defender’s Resolve: A self-buff that increases your resilience against incoming damage, often coupled with a boost in damage reduction or a temporary health shield.

    Divine Shield: A powerful ability that grants complete immunity to damage for a short time, perfect for avoiding lethal damage spikes during boss fights.

    3. Crowd Control Abilities

    Crowd control (CC) is essential for managing multiple enemies or preventing specific high-priority threats from overwhelming your party.

    Stuns: Stuns prevent enemies from acting for a short time, allowing you to control their movement and prevent them from dealing damage.

    Roots and Slows: Roots keep enemies from moving, while slows reduce their overall mobility. These can be crucial when dealing with fast-moving mobs or preventing enemies from flanking your group.

    4. Support Abilities

    Although tanking is primarily about survival, supporting your team through healing, buffs, or debuffs can significantly impact the outcome of a fight.

    Lay on Hands: A classic Paladin ability that allows you to heal yourself or an ally. This is particularly useful in extended fights where your healer may be overwhelmed.

    Aegis of Protection: A supportive AoE ability that grants damage reduction to allies within a certain range. This can turn the tide of battle by boosting your party’s survivability when the going gets tough.

    Gear and Equipment

    Your gear plays a crucial role in enhancing your tanking capabilities. As a tank, your main priority is to maximize survivability and threat generation.

    1. Armor

    Plate armor is the go-to for any tank, as it offers the best damage reduction and protection from physical attacks. Make sure you prioritize armor pieces that increase your Constitution, Endurance, and Armor.

    2. Weapons

    A sword and shield combination is optimal for most tanks. The shield not only adds protection but also increases your block chance, while the sword offers consistent threat generation. For Paladins, this setup also provides synergy with their defensive abilities, making it easier to generate and maintain aggro.

    Some tanks may prefer a two-handed weapon for higher damage output and threat generation. However, this comes at the cost of reduced defensive capabilities. Two-handed weapons are better suited for tanks that want to balance offense with defense.

    3. Enchantments and Glyphs

    Certain enchantments can provide additional damage reduction or threat generation. Make sure to use glyphs that increase your survivability or bolster your taunts. Health regeneration enchantments can also keep you alive longer in tough fights.

    Conclusion

    Tanking in Ashes of Creation is a rewarding yet demanding role that requires a mix of strategic thinking, reaction time, and team coordination. The Paladin offers a balanced tanking option, with a focus on defense, healing, and providing support to your team. By prioritizing the right attributes, skills, and gear, you can create a tank that excels at managing damage, controlling enemies, and ensuring the safety of your party. Whether you're diving into PvE content or engaging in PvP battles, mastering the tank role will be key to buy Ashes of Creation Gold in the world of Ashes of Creation.

    MMOEXP The purchase of Ashes of Creation Gold was really fast, will definitely only use this website in the future. The live chat was also very helpful.
    Ashes of Creation Gold: Mastering Tank Builds In the expansive world of Ashes of Creation Gold, players are introduced to a dynamic and ever-changing landscape where every role plays a pivotal part in the success of a group. The tank role, in particular, is a cornerstone in both PvE (Player vs Environment) and PvP (Player vs Player) content. As a tank, your primary responsibility is to absorb incoming damage, control the battlefield, and ensure that your allies remain unharmed. This comprehensive guide will walk you through the essentials of building a tank in Ashes of Creation, focusing on key mechanics, attributes, abilities, gear, and strategies to help you excel in the role. Understanding the Tank Role Before delving into the specifics of tanking in Ashes of Creation, it’s essential to understand what being a tank entails. The tank’s role is both simple and complex at the same time. A tank’s primary function is to act as the damage sponge for the group, absorbing hits that would otherwise fall on weaker members of the party. Tanks are tasked with keeping enemies focused on them, allowing damage dealers to unleash their full potential without fear of being targeted. The tank also controls crowd flow, meaning that they need to manage enemy positions, prevent stragglers from flanking, and control aggro, which is the threat that enemies feel toward a player. This threat can be manipulated using taunts, threat-generating abilities, and strategic positioning. Tanks are often the first line of defense in high-stakes encounters like raids, dungeons, or PvP battles, where managing incoming damage and controlling enemy movement is vital to the group’s survival. Choosing the Right Class The next step in crafting a tank build is selecting the appropriate archetype and advanced class. In Ashes of Creation, the class system is structured around Archetypes and Specializations. When it comes to tanking, the Knight archetype is the most viable option, as it is designed with high survivability and threat management in mind. Knight Archetype The Knight is a versatile archetype, well-suited to tanking roles due to its inherent defensive capabilities. A Knight can specialize into several classes, each bringing a unique approach to tanking. The three main specializations available to the Knight archetype are: Paladin: The Paladin is a defensive support tank, offering strong self-healing abilities, damage mitigation, and group support through buffs and debuffs. Paladins can keep themselves and their allies alive in prolonged fights, making them an excellent choice for sustained encounters. Guardian: Guardians are the classic “big, tough tank.” They focus on soaking up massive amounts of damage and controlling enemy movement. Their strength lies in their ability to lock down enemies with crowd control (CC) abilities and their formidable damage mitigation. Warlord: A more offensive tanking class, the Warlord excels at controlling multiple enemies simultaneously. While they may not have as much raw damage mitigation as the Guardian or Paladin, their ability to contribute damage while still keeping enemies focused on them makes them a flexible option for both tanking and dealing damage. For this guide, we will focus primarily on the Paladin specialization, as it is a popular choice for players who enjoy tanking while also providing support to their team. Key Attributes for Tanking When building a tank in Ashes of Creation, the right set of attributes is vital for ensuring you can withstand damage and perform your role effectively. The game uses a stat-based system, and certain attributes should be prioritized for tanking: 1. Constitution Constitution is one of the most important stats for a tank. It directly affects your health pool and survivability. A tank needs to have a substantial amount of health to endure sustained damage in both PvE and PvP. A higher Constitution allows you to soak more damage and survive longer, making you the effective damage sponge your team needs. 2. Endurance Endurance increases your stamina and your ability to block or mitigate incoming attacks. While Constitution boosts your overall health, Endurance helps with your damage reduction capabilities. It’s especially important for Paladins, who will be using abilities like Shield Wall and other damage mitigation skills. Ensuring that your Endurance is high enough will allow you to sustain these abilities longer and help with mobility, so you can reposition quickly if needed. 3. Armor Armor is a crucial factor in reducing physical damage. As a tank, your job is to absorb as much damage as possible, and a higher Armor rating will make you more resilient against physical attacks. In many cases, the best gear for a tank will be heavy armor, as it provides the highest level of damage reduction. 4. Agility While Agility isn’t a tank’s primary focus, a moderate amount of it can be useful for mobility. Agility improves your dodge chance, allowing you to avoid some attacks, especially in high-paced PvP encounters or against bosses with fast-moving abilities. While you should not neglect more vital stats like Constitution and Endurance, having a bit of Agility can improve your overall survivability in certain situations. Tank Abilities and Skills Every tank must have a well-rounded set of abilities that allow them to control aggro, mitigate damage, and protect their allies. Here are some key abilities you should focus on when building a tank: 1. Taunt Abilities Taunts are core to a tank’s ability to manage aggro. These abilities force enemies to focus their attacks on the tank instead of other party members. Effective taunting abilities not only generate threat but can also increase the tank’s control over the battlefield, ensuring that damage dealers and healers remain unharmed. Aggro Generation: Your taunt abilities should be used to pull enemies off your damage dealers. Be mindful of the threat generated by your DPS—if they surpass you in damage output, it could cause the enemy to switch targets. Area-of-Effect Taunts: Some taunts have a broader range, allowing you to gather multiple enemies and keep them under your control. These are particularly useful in dungeon runs or group combat. 2. Defensive Abilities The foundation of any tank is their ability to absorb damage. Defensive abilities provide crucial damage mitigation, allowing tanks to take hits that would otherwise wipe out squishy party members. Shield Wall: This ability significantly reduces the amount of damage taken over a short period, making it indispensable in high-damage phases of a fight. Defender’s Resolve: A self-buff that increases your resilience against incoming damage, often coupled with a boost in damage reduction or a temporary health shield. Divine Shield: A powerful ability that grants complete immunity to damage for a short time, perfect for avoiding lethal damage spikes during boss fights. 3. Crowd Control Abilities Crowd control (CC) is essential for managing multiple enemies or preventing specific high-priority threats from overwhelming your party. Stuns: Stuns prevent enemies from acting for a short time, allowing you to control their movement and prevent them from dealing damage. Roots and Slows: Roots keep enemies from moving, while slows reduce their overall mobility. These can be crucial when dealing with fast-moving mobs or preventing enemies from flanking your group. 4. Support Abilities Although tanking is primarily about survival, supporting your team through healing, buffs, or debuffs can significantly impact the outcome of a fight. Lay on Hands: A classic Paladin ability that allows you to heal yourself or an ally. This is particularly useful in extended fights where your healer may be overwhelmed. Aegis of Protection: A supportive AoE ability that grants damage reduction to allies within a certain range. This can turn the tide of battle by boosting your party’s survivability when the going gets tough. Gear and Equipment Your gear plays a crucial role in enhancing your tanking capabilities. As a tank, your main priority is to maximize survivability and threat generation. 1. Armor Plate armor is the go-to for any tank, as it offers the best damage reduction and protection from physical attacks. Make sure you prioritize armor pieces that increase your Constitution, Endurance, and Armor. 2. Weapons A sword and shield combination is optimal for most tanks. The shield not only adds protection but also increases your block chance, while the sword offers consistent threat generation. For Paladins, this setup also provides synergy with their defensive abilities, making it easier to generate and maintain aggro. Some tanks may prefer a two-handed weapon for higher damage output and threat generation. However, this comes at the cost of reduced defensive capabilities. Two-handed weapons are better suited for tanks that want to balance offense with defense. 3. Enchantments and Glyphs Certain enchantments can provide additional damage reduction or threat generation. Make sure to use glyphs that increase your survivability or bolster your taunts. Health regeneration enchantments can also keep you alive longer in tough fights. Conclusion Tanking in Ashes of Creation is a rewarding yet demanding role that requires a mix of strategic thinking, reaction time, and team coordination. The Paladin offers a balanced tanking option, with a focus on defense, healing, and providing support to your team. By prioritizing the right attributes, skills, and gear, you can create a tank that excels at managing damage, controlling enemies, and ensuring the safety of your party. Whether you're diving into PvE content or engaging in PvP battles, mastering the tank role will be key to buy Ashes of Creation Gold in the world of Ashes of Creation. MMOEXP The purchase of Ashes of Creation Gold was really fast, will definitely only use this website in the future. The live chat was also very helpful.
    ·2K Vues ·0 Avis
  • AI in Seafood Processing: Unlocking Efficiency with Vision Grading Systems

    Global Vision Oyster Grading Equipment market was valued at USD 10.6 million in 2025 and is projected to reach USD 14.7 million by 2034, exhibiting a CAGR of 4.9% during the forecast period.

    Download FREE Sample Report: https://www.24chemicalresearch.com/download-sample/306508/vision-oyster-grading-equipment-market

    #ChemicalResearch #Chemicals #ChemicalIndustry #MarketResearch #IndustryReport #MarketAnalysis #ChemicalMarket #BusinessIntelligence #ResearchReport #ChemicalEngineering #MarketInsights #ChemIndustry #IndustrialChemicals #ChemicalIndustry #MarketResearch #BespokeIntelligence #EquityResearch #BusinessConsulting #SupplyChainSolutions #IndustryInsights #GlobalChemicals #BuyerSellerPlatform #ResearchExcellence
    AI in Seafood Processing: Unlocking Efficiency with Vision Grading Systems Global Vision Oyster Grading Equipment market was valued at USD 10.6 million in 2025 and is projected to reach USD 14.7 million by 2034, exhibiting a CAGR of 4.9% during the forecast period. Download FREE Sample Report: https://www.24chemicalresearch.com/download-sample/306508/vision-oyster-grading-equipment-market #ChemicalResearch #Chemicals #ChemicalIndustry #MarketResearch #IndustryReport #MarketAnalysis #ChemicalMarket #BusinessIntelligence #ResearchReport #ChemicalEngineering #MarketInsights #ChemIndustry #IndustrialChemicals #ChemicalIndustry #MarketResearch #BespokeIntelligence #EquityResearch #BusinessConsulting #SupplyChainSolutions #IndustryInsights #GlobalChemicals #BuyerSellerPlatform #ResearchExcellence
    WWW.24CHEMICALRESEARCH.COM
    Sample Report: Vision Oyster Grading Equipment Market Demand, Supply Balance and Capacity Outlook and Forecast 2026-2034
    Download Sample Report PDF : The global Vision Oyster Grading Equipment market was valued at 10.6 million in 2025 and is projected to reach US$ 14.7 million by 2034, at a CAGR of 4.9% during the forecast period. The U.S. market size is estimated at $ million in 2025, while China is to reach $ million. Circular ...
    ·460 Vues ·0 Avis
  • https://prerana24web.wordpress.com/2026/03/12/gas-box-for-semiconductor-equipment-market-market-trends-business-strategies-and-forecast-2026-2034/
    https://prerana24web.wordpress.com/2026/03/12/gas-box-for-semiconductor-equipment-market-market-trends-business-strategies-and-forecast-2026-2034/
    PRERANA24WEB.WORDPRESS.COM
    Gas Box for Semiconductor Equipment Market,: Market Trends, Business Strategies and Forecast 2026-2034
    The global Gas Box for Semiconductor Equipment Market, valued at US$ 1078 million in 2024, is poised for substantial growth, projected to reach US$ 1808 million by 2032. This expansion, driven by a…
    ·328 Vues ·0 Avis
  • Why North America dominating Global Heptafluoroisobutyronitrile US electrical infrastructure?

    Global Heptafluoroisobutyronitrile (C4F7N) market has seen remarkable growth, driven by its increasing adoption as an environmentally friendly alternative to sulfur hexafluoride (SF6) in electrical equipment. In 2023, the market was valued at USD 32 million, and it is projected to reach USD 72.42 million by 2032, growing at a compound annual growth rate (CAGR) of 9.50% during the forecast period.

    Download FREE Sample Report: https://www.24chemicalresearch.com/download-sample/288851/global-heptafluoroisobutyronitrile-forecast-market-2025-2032-516
    Why North America dominating Global Heptafluoroisobutyronitrile US electrical infrastructure? Global Heptafluoroisobutyronitrile (C4F7N) market has seen remarkable growth, driven by its increasing adoption as an environmentally friendly alternative to sulfur hexafluoride (SF6) in electrical equipment. In 2023, the market was valued at USD 32 million, and it is projected to reach USD 72.42 million by 2032, growing at a compound annual growth rate (CAGR) of 9.50% during the forecast period. Download FREE Sample Report: https://www.24chemicalresearch.com/download-sample/288851/global-heptafluoroisobutyronitrile-forecast-market-2025-2032-516
    WWW.24CHEMICALRESEARCH.COM
    Sample Report: Heptafluoroisobutyronitrile Market, Global Outlook and Forecast 2025-2032
    Download Sample Report PDF : Global Heptafluoroisobutyronitrile market was valued at USD 32M in 2023 and is projected to reach USD 72.42M by 2032, at a CAGR of 9.5% during the forecast period.
    ·305 Vues ·0 Avis
  • https://prerana24web.wordpress.com/2026/03/10/semiconductor-front-end-equipment-market-trends-business-strategies-2026-2034/
    https://prerana24web.wordpress.com/2026/03/10/semiconductor-front-end-equipment-market-trends-business-strategies-2026-2034/
    PRERANA24WEB.WORDPRESS.COM
    Semiconductor Front-End Equipment Market, Trends, Business Strategies 2026-2034
    The global Semiconductor Front-End Equipment Market, valued at a robust US$ 97.07 billion in 2024, is on a trajectory of significant expansion, projected to reach US$ 154.25 billion by 2032. This g…
    1
    ·388 Vues ·0 Avis
  • D2R Items: Icy Cellar Farming Route Explained

    In D2R Items, ladder players are always searching for the most efficient ways to gain experience, acquire runes, and improve their gear. One often overlooked yet highly effective location for early ladder farming is the Icy Cellar, located beneath the Countess Tower in Act I. While not as flashy as endgame areas, the Icy Cellar provides a unique combination of high monster density, reliable rune drops, and efficient XP farming that makes it invaluable for players preparing for Nightmare and Hell difficulties. This guide explores why the Icy Cellar is worth farming, how to prepare for it, and strategies for maximizing your farming efficiency.

    1. Why Farm the Icy Cellar
    The Icy Cellar is especially popular among ladder players for several key reasons:

    Rune Farming: The Icy Cellar is renowned for dropping low- to mid-level runes, such as El, Eld, Tir, and Ral. These runes are essential for early runewords like Stealth, Leaf, and Lore, which provide a significant boost to survivability, skill points, and damage output. Early ladder progression often hinges on obtaining these runes efficiently, and repeated Icy Cellar runs are one of the fastest ways to farm them.

    Experience Gains: The Icy Cellar features dense groups of Skeletons, Ghosts, and Ice Warriors. This makes it highly efficient for XP farming, particularly for characters just entering Nightmare difficulty. Unlike slower farming areas, the Icy Cellar allows players to eliminate large numbers of enemies quickly, which adds up to significant experience over multiple runs.

    Accessibility and Speed: The dungeon is easily accessible beneath the Countess Tower in the Black Marsh. The short distance from town and compact dungeon layout make the Icy Cellar ideal for repeated farming sessions, minimizing downtime and maximizing XP and loot per hour.

    Loot Opportunities: Aside from runes, monsters in the Icy Cellar drop equipment, charms, and gold that are valuable for early ladder builds. Magic Find gear and high-damage skills increase the chance of rare or set items appearing, providing additional incentives to farm this area.

    2. Preparing for Icy Cellar Farming
    Preparation is key to making the most out of Icy Cellar runs. While the dungeon may seem simple, ignoring preparation can slow farming or lead to repeated deaths.

    A. Gear and Resistances
    Cold Resistance: Ice Warriors and certain undead enemies inflict cold damage, making resistance a priority. Aim for at least 50% in Nightmare and 75% in Hell difficulty to avoid being frozen or taking critical damage.

    Damage Output: The Icy Cellar is packed with tightly grouped enemies, making area-of-effect (AoE) skills essential. Sorceresses benefit from Blizzard or Chain Lightning, Paladins from Blessed Hammer or Holy Shock, and Druids from Fissure or Tornado. Melee characters should prioritize weapons with high damage, elemental enhancements, or bonuses against undead.

    Life and Defense: Maintaining a healthy life pool is important, even for early Act I areas. Gear with life leech, vitality, and armor bonuses will sustain you through multiple waves of enemies. Underestimating this can slow down farming or result in unnecessary downtime.

    B. Potions and Inventory
    Potions: Stock up on healing and rejuvenation potions. While the Icy Cellar is manageable, long farming sessions increase the risk of sustaining damage that requires healing. Cold resist potions or thawing potions are especially useful if you are under-geared against cold-based enemies.

    Inventory Management: Keep inventory space free for rune collection, charms, and gold. Efficient inventory management prevents unnecessary trips back to town, keeping XP and rune acquisition rates high.

    C. Mercenary Support
    Though optional, an Act II mercenary can dramatically increase farming efficiency. Mercenaries with Holy Freeze slow enemies, reducing incoming damage, while those with Might increase your overall damage output. Equipping a mercenary with tanking gear or items that boost resistances ensures they survive through waves of enemies, letting you focus on AoE attacks and loot collection.

    3. Optimal Classes for Icy Cellar Farming
    Certain classes excel in the Icy Cellar due to their skill sets and ability to manage densely packed undead mobs.

    Sorceress: A Blizzard or Chain Lightning Sorceress is highly effective. Blizzard freezes enemies in place, making them easy to eliminate safely, while Chain Lightning can target multiple mobs simultaneously. Teleport allows repositioning to avoid damage or navigate through tight corridors efficiently.

    Paladin: Hammerdins using Blessed Hammer and Concentration aura can clear dense enemy packs while maintaining high survivability. Defensive auras and Holy Shield make it easy to sustain through waves of undead, and Magic Find gear increases loot quality.

    Druid: Elemental Druids using Fissure, Tornado, or Hurricane can deal significant AoE damage, while summoning pets absorb incoming attacks. Proper positioning ensures consistent damage output while minimizing risk from Ice Warriors and ranged undead.

    Barbarian: Whirlwind or Frenzy Barbarians are effective if equipped with adequate life and resistance gear. Whirlwind allows continuous movement through packs while dealing damage. Maintaining buffs such as Battle Orders and Battle Command ensures survival and efficiency.

    4. Farming Strategy and Route
    Efficient Icy Cellar farming is not about simply killing enemies; it requires careful route planning and tactics.

    Start at the Entrance: Begin by clearing enemies near the Countess Tower entrance to maintain controlled engagement. This prevents getting surrounded early in the run.

    Move Methodically: The Icy Cellar has multiple corridors and small rooms. Clearing each area systematically ensures no enemies are missed and maximizes XP and loot efficiency.

    Use Choke Points: Narrow corridors are ideal for funneling enemies. Position yourself so that AoE skills hit multiple enemies simultaneously while minimizing incoming damage.

    Target Champions and Rare Monsters: Champion and unique monsters drop higher-quality loot and runes. Prioritize them over regular mobs to maximize the value of each run.

    Potion Timing: Use potions proactively rather than reactively. Preemptive healing prevents downtime and reduces risk during enemy-heavy waves.

    Loot Management: Pick up runes, charms, and valuable items promptly. Using items like Goldwrap or gear that boosts pickup speed ensures efficiency. Magic Find gear enhances the chance of rare drops.

    5. Hell Difficulty Considerations
    Farming the Icy Cellar on Hell difficulty requires additional preparation. Monsters hit harder, so resistances must be capped, life must be maximized, and crowd control becomes even more important. Mercenaries equipped with tanking gear or Holy Freeze auras are invaluable for absorbing damage and slowing enemy movement. Life leech, mana regeneration, and high defense gear increase sustainability during long runs. Patience and careful planning are essential for Hell-level farming.

    6. Rune and Item Optimization
    One of the main goals of Icy Cellar farming is rune acquisition. Low- to mid-level runes like El, Eld, Tir, and Ral drop consistently in this area. These runes are critical for early ladder runewords, such as Stealth, Leaf, and Lore, which dramatically improve early-game survivability and damage.

    Magic Find gear further enhances the probability of rare items, while focusing on champion and unique monsters ensures the highest quality loot. Collecting charms with life, resistances, or skill bonuses provides additional passive benefits, allowing characters to farm longer without risking death.

    Conclusion
    The Icy Cellar in Diablo 2 Resurrected is an often-overlooked farming hotspot for ladder players. It combines dense enemy packs, valuable rune drops, and XP efficiency in a highly accessible location. With proper preparation, gear, skills, and strategy, players can farm this area repeatedly to buy D2R Ladder Runes, improve gear, and level up efficiently. Whether playing as a Sorceress, Paladin, Druid, or Barbarian, the Icy Cellar rewards careful planning, strategic use of AoE skills, and consistent farming methodology.

    MMOexp.com boasts years of experience in the D2R Items industry and can guarantee to provide you with the highest quality service.
    D2R Items: Icy Cellar Farming Route Explained In D2R Items, ladder players are always searching for the most efficient ways to gain experience, acquire runes, and improve their gear. One often overlooked yet highly effective location for early ladder farming is the Icy Cellar, located beneath the Countess Tower in Act I. While not as flashy as endgame areas, the Icy Cellar provides a unique combination of high monster density, reliable rune drops, and efficient XP farming that makes it invaluable for players preparing for Nightmare and Hell difficulties. This guide explores why the Icy Cellar is worth farming, how to prepare for it, and strategies for maximizing your farming efficiency. 1. Why Farm the Icy Cellar The Icy Cellar is especially popular among ladder players for several key reasons: Rune Farming: The Icy Cellar is renowned for dropping low- to mid-level runes, such as El, Eld, Tir, and Ral. These runes are essential for early runewords like Stealth, Leaf, and Lore, which provide a significant boost to survivability, skill points, and damage output. Early ladder progression often hinges on obtaining these runes efficiently, and repeated Icy Cellar runs are one of the fastest ways to farm them. Experience Gains: The Icy Cellar features dense groups of Skeletons, Ghosts, and Ice Warriors. This makes it highly efficient for XP farming, particularly for characters just entering Nightmare difficulty. Unlike slower farming areas, the Icy Cellar allows players to eliminate large numbers of enemies quickly, which adds up to significant experience over multiple runs. Accessibility and Speed: The dungeon is easily accessible beneath the Countess Tower in the Black Marsh. The short distance from town and compact dungeon layout make the Icy Cellar ideal for repeated farming sessions, minimizing downtime and maximizing XP and loot per hour. Loot Opportunities: Aside from runes, monsters in the Icy Cellar drop equipment, charms, and gold that are valuable for early ladder builds. Magic Find gear and high-damage skills increase the chance of rare or set items appearing, providing additional incentives to farm this area. 2. Preparing for Icy Cellar Farming Preparation is key to making the most out of Icy Cellar runs. While the dungeon may seem simple, ignoring preparation can slow farming or lead to repeated deaths. A. Gear and Resistances Cold Resistance: Ice Warriors and certain undead enemies inflict cold damage, making resistance a priority. Aim for at least 50% in Nightmare and 75% in Hell difficulty to avoid being frozen or taking critical damage. Damage Output: The Icy Cellar is packed with tightly grouped enemies, making area-of-effect (AoE) skills essential. Sorceresses benefit from Blizzard or Chain Lightning, Paladins from Blessed Hammer or Holy Shock, and Druids from Fissure or Tornado. Melee characters should prioritize weapons with high damage, elemental enhancements, or bonuses against undead. Life and Defense: Maintaining a healthy life pool is important, even for early Act I areas. Gear with life leech, vitality, and armor bonuses will sustain you through multiple waves of enemies. Underestimating this can slow down farming or result in unnecessary downtime. B. Potions and Inventory Potions: Stock up on healing and rejuvenation potions. While the Icy Cellar is manageable, long farming sessions increase the risk of sustaining damage that requires healing. Cold resist potions or thawing potions are especially useful if you are under-geared against cold-based enemies. Inventory Management: Keep inventory space free for rune collection, charms, and gold. Efficient inventory management prevents unnecessary trips back to town, keeping XP and rune acquisition rates high. C. Mercenary Support Though optional, an Act II mercenary can dramatically increase farming efficiency. Mercenaries with Holy Freeze slow enemies, reducing incoming damage, while those with Might increase your overall damage output. Equipping a mercenary with tanking gear or items that boost resistances ensures they survive through waves of enemies, letting you focus on AoE attacks and loot collection. 3. Optimal Classes for Icy Cellar Farming Certain classes excel in the Icy Cellar due to their skill sets and ability to manage densely packed undead mobs. Sorceress: A Blizzard or Chain Lightning Sorceress is highly effective. Blizzard freezes enemies in place, making them easy to eliminate safely, while Chain Lightning can target multiple mobs simultaneously. Teleport allows repositioning to avoid damage or navigate through tight corridors efficiently. Paladin: Hammerdins using Blessed Hammer and Concentration aura can clear dense enemy packs while maintaining high survivability. Defensive auras and Holy Shield make it easy to sustain through waves of undead, and Magic Find gear increases loot quality. Druid: Elemental Druids using Fissure, Tornado, or Hurricane can deal significant AoE damage, while summoning pets absorb incoming attacks. Proper positioning ensures consistent damage output while minimizing risk from Ice Warriors and ranged undead. Barbarian: Whirlwind or Frenzy Barbarians are effective if equipped with adequate life and resistance gear. Whirlwind allows continuous movement through packs while dealing damage. Maintaining buffs such as Battle Orders and Battle Command ensures survival and efficiency. 4. Farming Strategy and Route Efficient Icy Cellar farming is not about simply killing enemies; it requires careful route planning and tactics. Start at the Entrance: Begin by clearing enemies near the Countess Tower entrance to maintain controlled engagement. This prevents getting surrounded early in the run. Move Methodically: The Icy Cellar has multiple corridors and small rooms. Clearing each area systematically ensures no enemies are missed and maximizes XP and loot efficiency. Use Choke Points: Narrow corridors are ideal for funneling enemies. Position yourself so that AoE skills hit multiple enemies simultaneously while minimizing incoming damage. Target Champions and Rare Monsters: Champion and unique monsters drop higher-quality loot and runes. Prioritize them over regular mobs to maximize the value of each run. Potion Timing: Use potions proactively rather than reactively. Preemptive healing prevents downtime and reduces risk during enemy-heavy waves. Loot Management: Pick up runes, charms, and valuable items promptly. Using items like Goldwrap or gear that boosts pickup speed ensures efficiency. Magic Find gear enhances the chance of rare drops. 5. Hell Difficulty Considerations Farming the Icy Cellar on Hell difficulty requires additional preparation. Monsters hit harder, so resistances must be capped, life must be maximized, and crowd control becomes even more important. Mercenaries equipped with tanking gear or Holy Freeze auras are invaluable for absorbing damage and slowing enemy movement. Life leech, mana regeneration, and high defense gear increase sustainability during long runs. Patience and careful planning are essential for Hell-level farming. 6. Rune and Item Optimization One of the main goals of Icy Cellar farming is rune acquisition. Low- to mid-level runes like El, Eld, Tir, and Ral drop consistently in this area. These runes are critical for early ladder runewords, such as Stealth, Leaf, and Lore, which dramatically improve early-game survivability and damage. Magic Find gear further enhances the probability of rare items, while focusing on champion and unique monsters ensures the highest quality loot. Collecting charms with life, resistances, or skill bonuses provides additional passive benefits, allowing characters to farm longer without risking death. Conclusion The Icy Cellar in Diablo 2 Resurrected is an often-overlooked farming hotspot for ladder players. It combines dense enemy packs, valuable rune drops, and XP efficiency in a highly accessible location. With proper preparation, gear, skills, and strategy, players can farm this area repeatedly to buy D2R Ladder Runes, improve gear, and level up efficiently. Whether playing as a Sorceress, Paladin, Druid, or Barbarian, the Icy Cellar rewards careful planning, strategic use of AoE skills, and consistent farming methodology. MMOexp.com boasts years of experience in the D2R Items industry and can guarantee to provide you with the highest quality service.
    ·2K Vues ·0 Avis
  • You don't need a high-end espresso machine to brew a perfect cup of coffee! ☕ A former barista shares valuable insights on how even the simplest machines can deliver exceptional results. The key lies in technique and quality ingredients rather than fancy gadgets.

    I remember starting my coffee journey with a basic machine, and it was the small adjustments in my brewing process that transformed my morning routine. Don't let equipment hold you back; focus on mastering the art of coffee-making!

    Ready to elevate your coffee game without breaking the bank? Explore how simplicity can lead to delicious brews!

    Read more here: https://www.wired.com/story/casabrews-5700-espresso-machine-java-base/

    #CoffeeTips #EspressoLove #HomeBrew #SimpleBrew #CoffeeCulture
    You don't need a high-end espresso machine to brew a perfect cup of coffee! ☕ A former barista shares valuable insights on how even the simplest machines can deliver exceptional results. The key lies in technique and quality ingredients rather than fancy gadgets. I remember starting my coffee journey with a basic machine, and it was the small adjustments in my brewing process that transformed my morning routine. Don't let equipment hold you back; focus on mastering the art of coffee-making! Ready to elevate your coffee game without breaking the bank? Explore how simplicity can lead to delicious brews! Read more here: https://www.wired.com/story/casabrews-5700-espresso-machine-java-base/ #CoffeeTips #EspressoLove #HomeBrew #SimpleBrew #CoffeeCulture
    WWW.WIRED.COM
    Your Espresso Machine Doesn’t Have to Be Fancy to Make Good Coffee
    A former barista explains why your espresso machine doesn't have to be fancy to make quality coffee.
    ·734 Vues ·0 Avis
Plus de résultats
Babafig https://www.babafig.com